26. Server
With an MQC Server, you have a centralized data storage and an analysis platform. The server can manage and/or integrate (ldap) user accounts, groups and permissions of the library and the data.
An MQC Server also provides a web interface, which removes the need for the MQC desktop client by providing a web player, that runs the client instances on the server, which are created on demand.
A user with editor or viewer access can open the web interface in any modern browser.

Figure 26.1 Login prompt of the server’s web application
After login, a viewer user has access to the Library and any project stored there, whereas an editor user is also able to create new projects (see User Groups).
Administrators additionally have access to user, group and library management, the automation service and more.
If you need more information of the administration of an MQC Server, please contact the MQC Support: mqc@model-engineers.com.
26.1. User Groups
Each MQC user has to be assigned to one of the following user groups, which are available at the MQC Server:
MQC Editor
MQC Viewer
26.1.1. MQC Editor
Users belonging to the editor group can create new projects (see Figure 26.2), adapt existing projects, e.g. changing the configuration, save projects or browse already stored projects from the library.
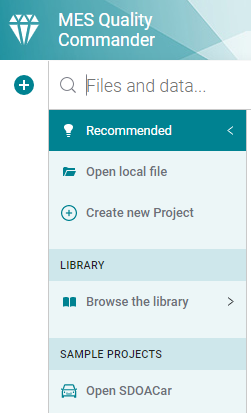
Figure 26.2 Editors are able to create new projects and to load existing projects
As editor, a user has access to the whole Action and Configuration menu for changing the configuration of
a project and to interact with it. For more information about possible activities, please check the
Menu with Actions and Configuration chapter.
26.1.2. MQC Viewer
Users belonging to the viewer group can only browse projects stored in the MQC Server library or on a network drive connected to the server (see Figure 26.3).
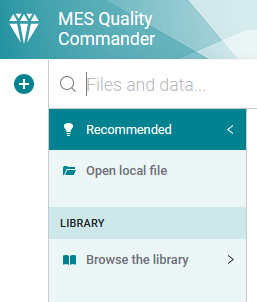
Figure 26.3 Viewers are only able to load existing projects from the library or from a network drive
Once an existing project has been loaded, a viewer has no access to the CONFIGURATION section of
the Action and Configuration menu and is not able to change the configuration (e.g. by adding a quality model
or a project structure) or the settings of the project.
Apart from that, all MQC functions to investigate the project, do filtering and marking and create reports are
available to viewers as well (see Figure 26.4).
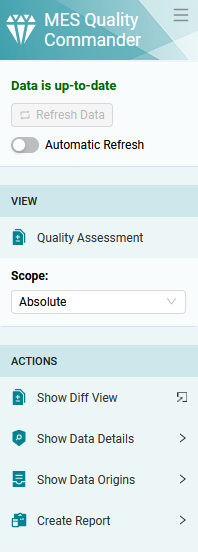
Figure 26.4 Panel functionalities available to viewer users
26.2. Library
The MQC Server library is a virtual storage of created projects (.dxp files locally) and Automation Jobs.
Every user has access to the same library, but the permissions can restrict access to functionality and whole folders. While a role like an MQC Viewer can only open existing projects, an MQC Editor can also save a new project in the library.
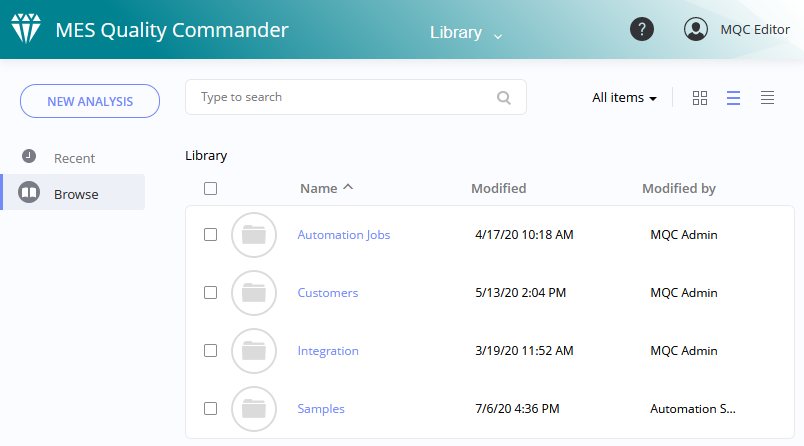
Figure 26.5 Server library with accessible folders and saved analyses
26.3. Web Player
The MQC Server provides a Web Player to create or open a Project directly in the browser. When opening a Project, a new instance is created on the server, which allows multiple open Projects for the same user.
The Web Player is feature identical as the MQC Desktop Client.
A link to a specific project opening in the web player can be created very easily using a common url format: https://your-mqc-server.intern/spotfire/wp/OpenAnalysis?file={LibraryPath}
Figure 26.6 Web player with no analysis loaded
The library can be accessed directly inside the web player without opening the library itself.
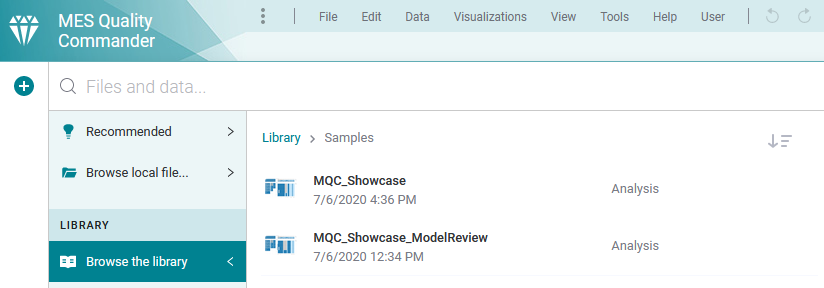
Figure 26.7 Server library in the web player
To create a new project, follow the instructions as described in Creating an MQC project. Please note, that any data source (i.e. network drive or Git repository) must be accessible by the MQC Server. Especially, if you are using a Setup Configuration, this applies to all the included paths for data as well as for configuration files.
26.4. Update Projects on Server
The MQC Server Automation Services is a web service, which is responsible to automatically execute jobs.
To schedule such a job with the purpose to periodically update MQC projects stored in the server library, the job itself must be saved in the library.
26.4.1. Add Update Job to Library
Open the MQC Editor and connect to the server as MQC admin.
From the menu bar select as shown in Figure 26.8.
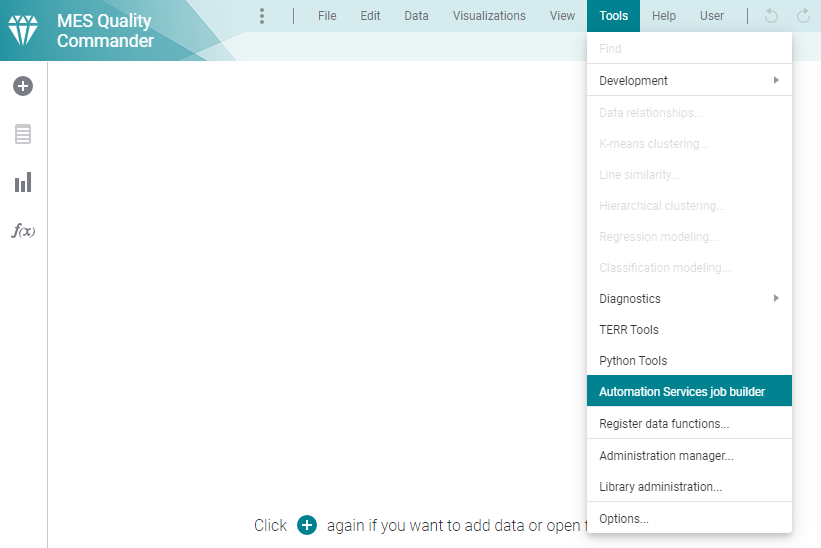
Figure 26.8 Open the Automation Service job builder via the MQC toolbar.
This opens the job builder dialog. Click on the Add button and choose
the job (see
Figure 26.9).
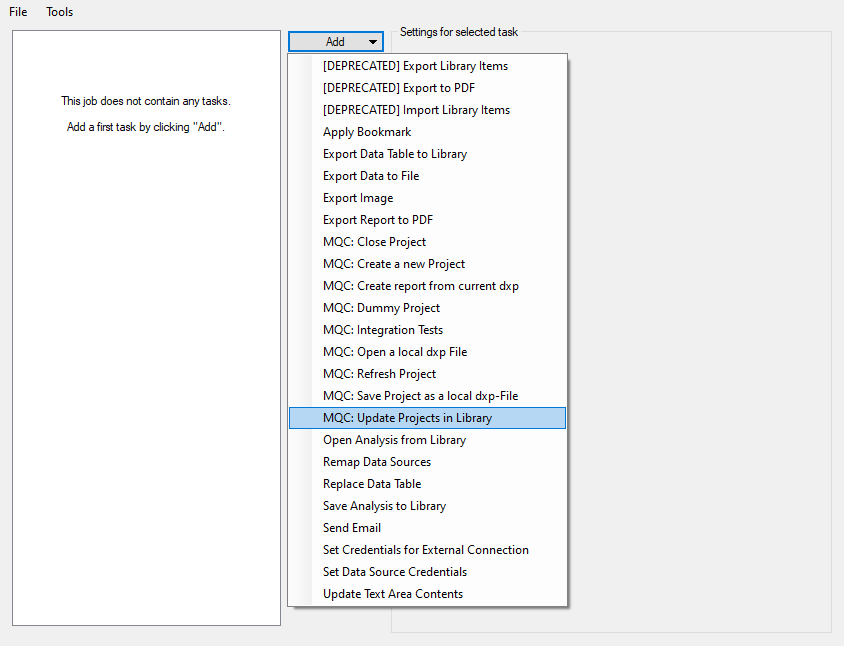
Figure 26.9 Select the job from the job builder dialog.
Now, the selected job must be added to the server library via
chosen from the menu bar on top
of the dialog. In the dialog navigate to the
folder, provide a name for your job, e.g.
“UpdateProjects” and click on Save (see
Figure 26.10).
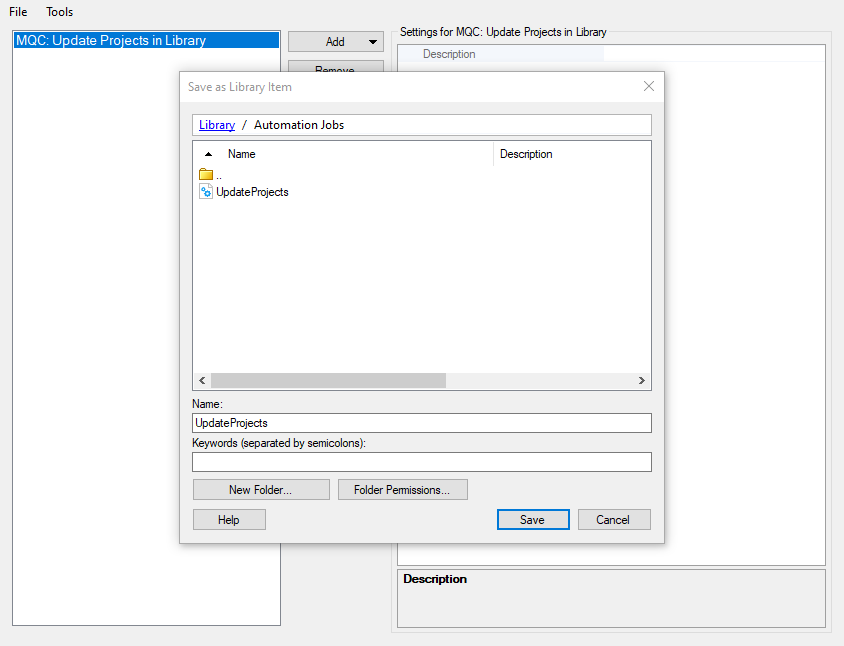
Figure 26.10 Add the selected job to the MQC Server Library.
The update job is now available on the MQC server and can be scheduled there.
26.4.2. Schedule Update Job
Open a browser and login to the MQC Server as MQC Admin. Then select from the dropdown at the menu bar (see Figure 26.11) to open the “Automation Services” page.
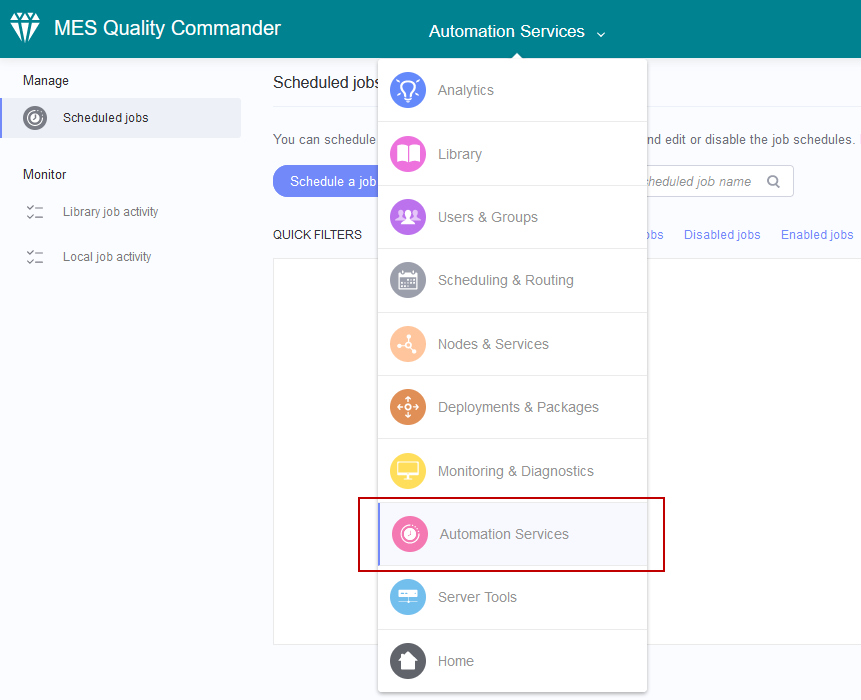
Figure 26.11 Go to page to schedule a job.
Click on the Schedule a job button to add a new job to the automation
services. Choose the Browse button and navigate to the
folder in the server library. The folder
should contain the update job, e.g. “UpdateProjects”, which was added to the
library before (see Figure 26.12).
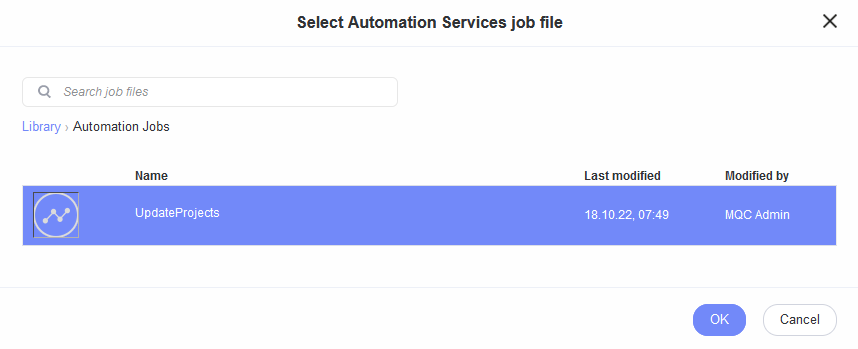
Figure 26.12 Select the “UpdateProjects” job file from the server library.
After adding the job file, use the Add schedule button to define one or
multiple schedules to update the projects stored in the library (see
Figure 26.13).
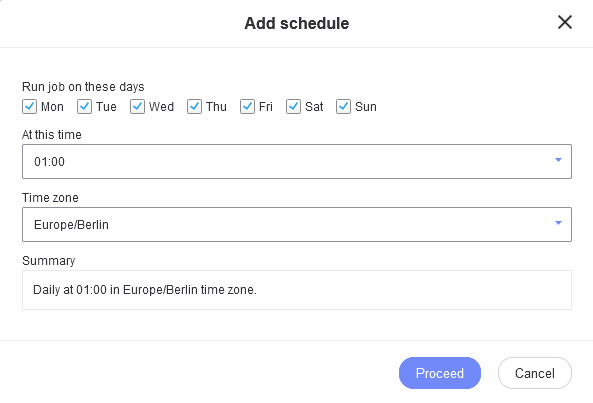
Figure 26.13 Add one or more time schedules to the “UpdateProjects” job.
Figure 26.14 shows a job that is periodically executed each day at 0:00 AM and at 1:30 AM. This job can be disabled to stop the automatic update of all projects stored in the server library.
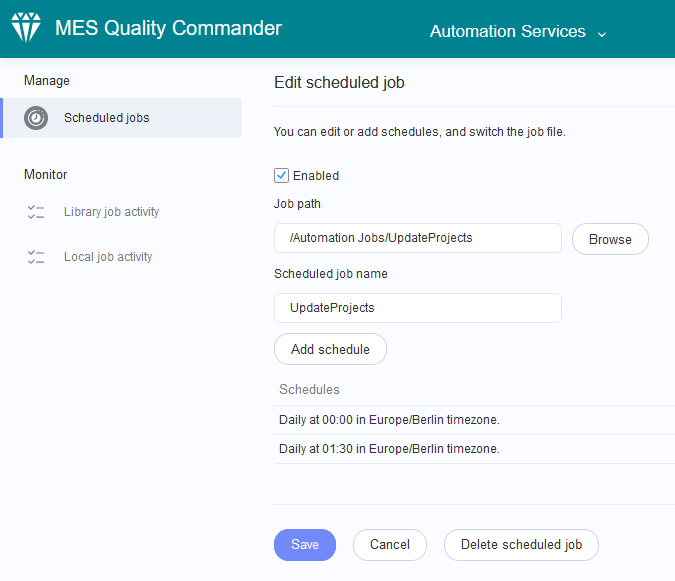
Figure 26.14 Enable or disable the configured job to update MQC projects stored in the MQC Server Library.
Note
To control the automatic server update per stored project, please, refer to Automatic server refresh.